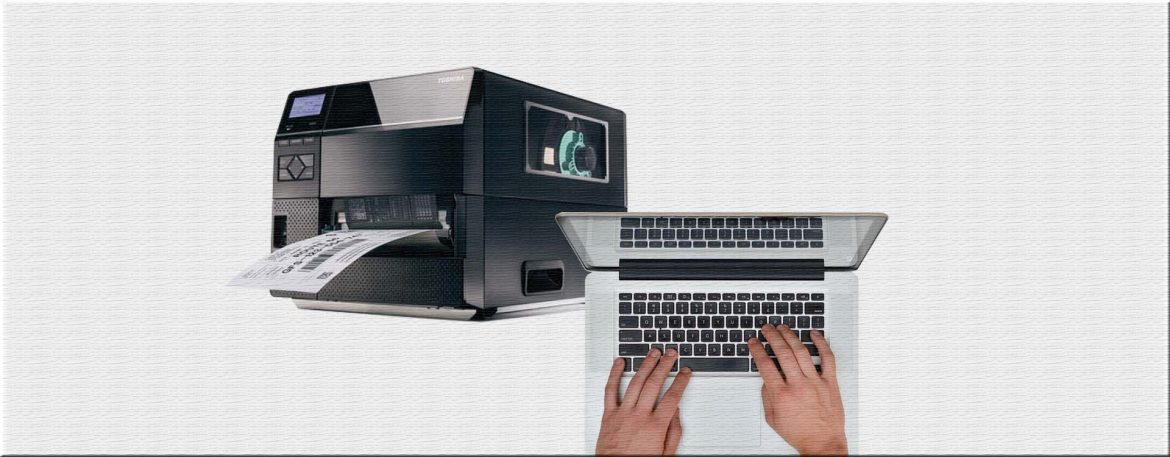
Here we will step by step tell and show how to set up a label printer.
1. UNPACKING THE PRINTER
Perform the initial unpacking of the printer. Remove all protective membranes!
Make sure you have a cable to connect to a PC. Not all manufacturers or models of printers have them in the kit, so you need to clarify this point in advance when buying a printer.
2. LOADING PRINT MATERIALS
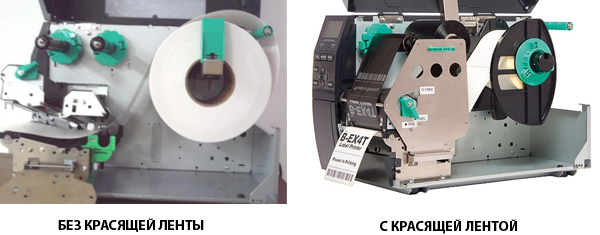
Before turning on the printer, you need to install the media: label roll and, if necessary, an ink ribbon (Ribbon).
That is, if you plan to use only a thermal label, then an ink ribbon is not needed. In other cases (semi-glossy labels, textile ribbons, etc.), printing occurs only with the use of an ink ribbon.
After installing the label, it is IMPORTANT to remember to set the sensors that will calibrate the label for correct printing.
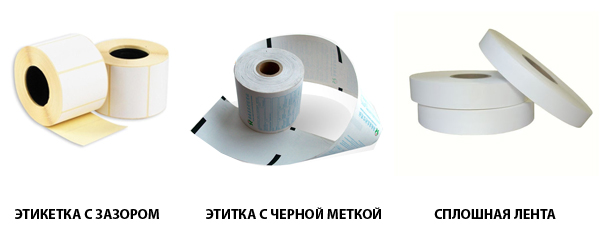
– If a label with gaps is used, then the sensor should be located in the middle of the label (or where there is a gap between the labels).
– If a label with a black mark is used (e.g. perforated labels), then the sensor must be located exactly below this mark.
– If a continuous tape is used (e.g. textile), then the calibration sensor will not be used so its location doesn’t matter.
3. TURNING ON THE PRINTER AND CONNECTING TO PC
After the media has been loaded, connect the printer to the PC via the USB cable, turn on the power of the printer.
4. INSTALLING THE DRIVER ON THE PC AND SETTING THE PARAMETERS
Before installation, we recommend download the latest (current) version of the driver for your printer. After that, you can proceed with the installation, following all the recommendations during the process.
When the driver is installed, make the print settings. To do this, on your PC go to “Control Panel” -> “Devices and Printers“.
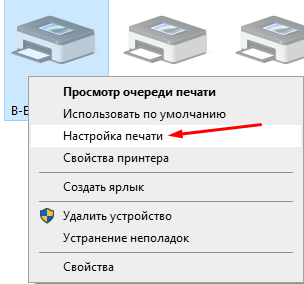
Then right click on your printer icon and select “Printing Preferences“”
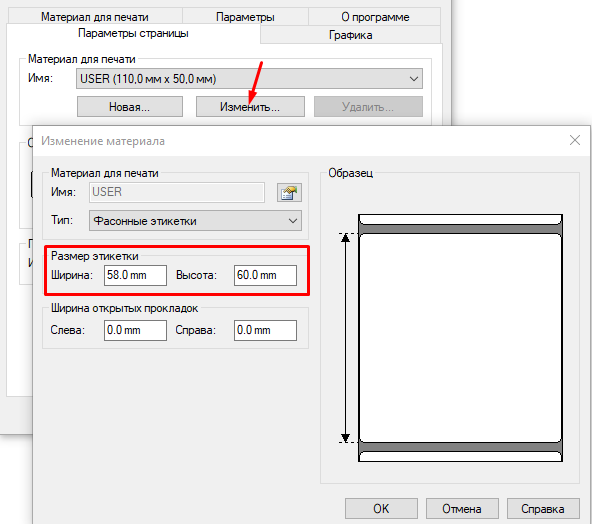
1. In the window that opens, select the “Page Setup” tab. In this window, you need to set the dimensions of your label (print area). If the dimensions in the settings differ from the actual ones, the printer will give an error when printing or print not in the label dimensions.
Don’t forget to click “Apply” after making changes.
2.The next step is to tell the printer which printing method to use and which type of calibration sensor to work with.
To do this, go to the “Material for printing” tab. Here you need to specify:
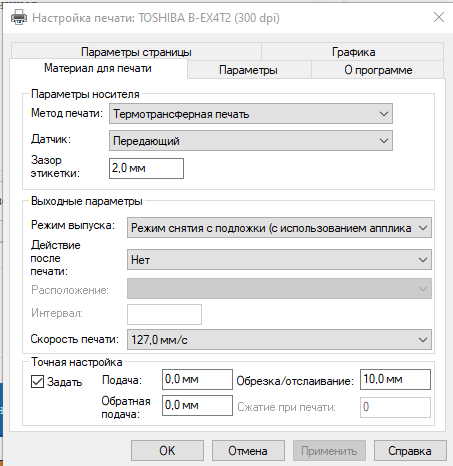
- Print Method.If an ink ribbon (Ribbon) is used, then select “Thermal transfer printing“, if not, then “Direct thermal printing” (for thermal label).
- Sensor. If the label has a gap, then set “Transmitting“. If with a black mark – “Reflective“. If continuous tape – value “None“
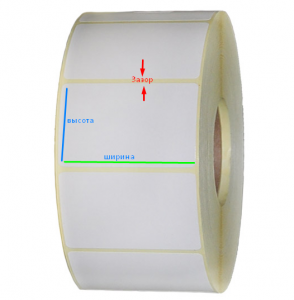
- Label Gap. The width of the gap between labels to be calibrated.
Also in this tab, you can set additional settings, such as “Output Options” (action after printing) and “Print Speed”.
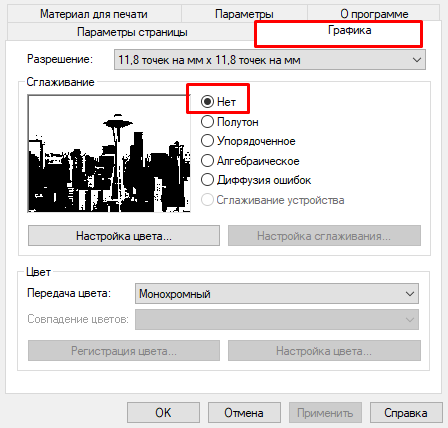
3. In the “Graphics” tab, you need to set the “Anti-Aliasing” value to “None”. This will improve the quality of the printed output.
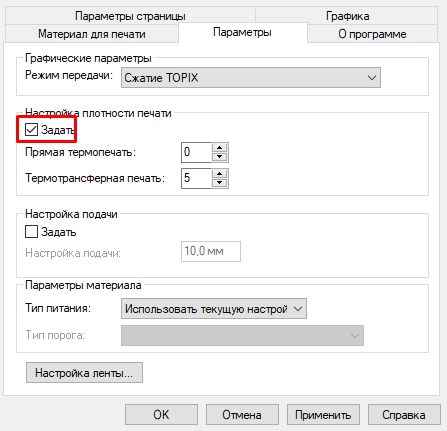
4. Changing the settings in the “Parameters” tab is optional. If during printing or adjustment you need to increase/decrease the clarity (density) of the printed output, you can do this by changing the print density (increasing or decreasing the heat of the print head) for the mode currently used by the printer.
It is worth noting that working at maximum values for a long time can lead to a quick (premature) failure of the print head.
5. PRINTER CALIBRATION
The completion of the label printer setup will be its calibration.
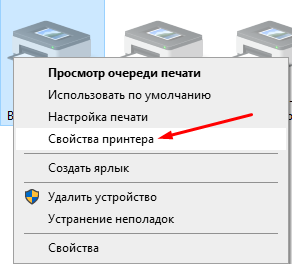
To do this, you need to right-click on your printer icon and select “Printer properties”.
Then go to the “General” tab and click on the “Proof Print” button (you can run several labels at once).
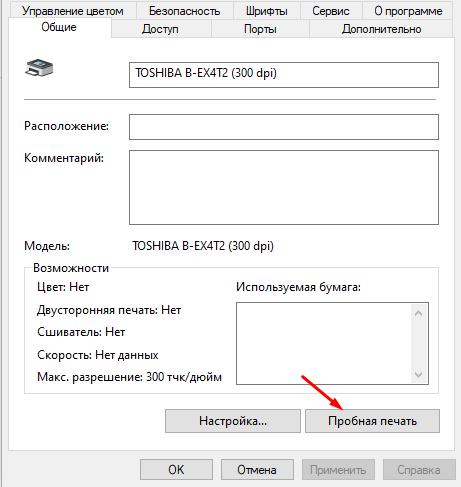
Make sure the label is calibrated and the print quality meets your requirements.

